Showing posts with label food. Show all posts

Monday, 9 October 2017

10 ways to live more sustainably.

Recently I re-found a document called "75 Ways to Live More Sustainably in 2013". Thankfully it doesn't only apply to 2013 and has some good tips for more sustainable living...

We are constantly trying to live a clean and sustainable life, for us and for our environment. From the list, lots of things we do well, others are stupid, and others we want to work on. Let me share 10 with you:

  1. Start reading the labels on your food. This is how we shop (when we go to the shops), we don't read the nutritional information, but the ingredients list. What is actually in the food. We don't buy food if we don't know what it is or the list is super long.
  2. Switch to reusable grocery bags when you shop. If you're not already doing this, then I think you should. Sure, the grocery bags can be good for some bins as bin liners, but half the the time they have holes in them and can't be used. Save landfill!
  3. Buy second hand... everything. Buying everything second hand is difficult, but you might as well try. We try to source as many of our homewares second hand but I'm sure there's heaps more we could be getting. I'd recommend, if not buying second hand, then buy local and support local businesses. Often their practices are more ethical.
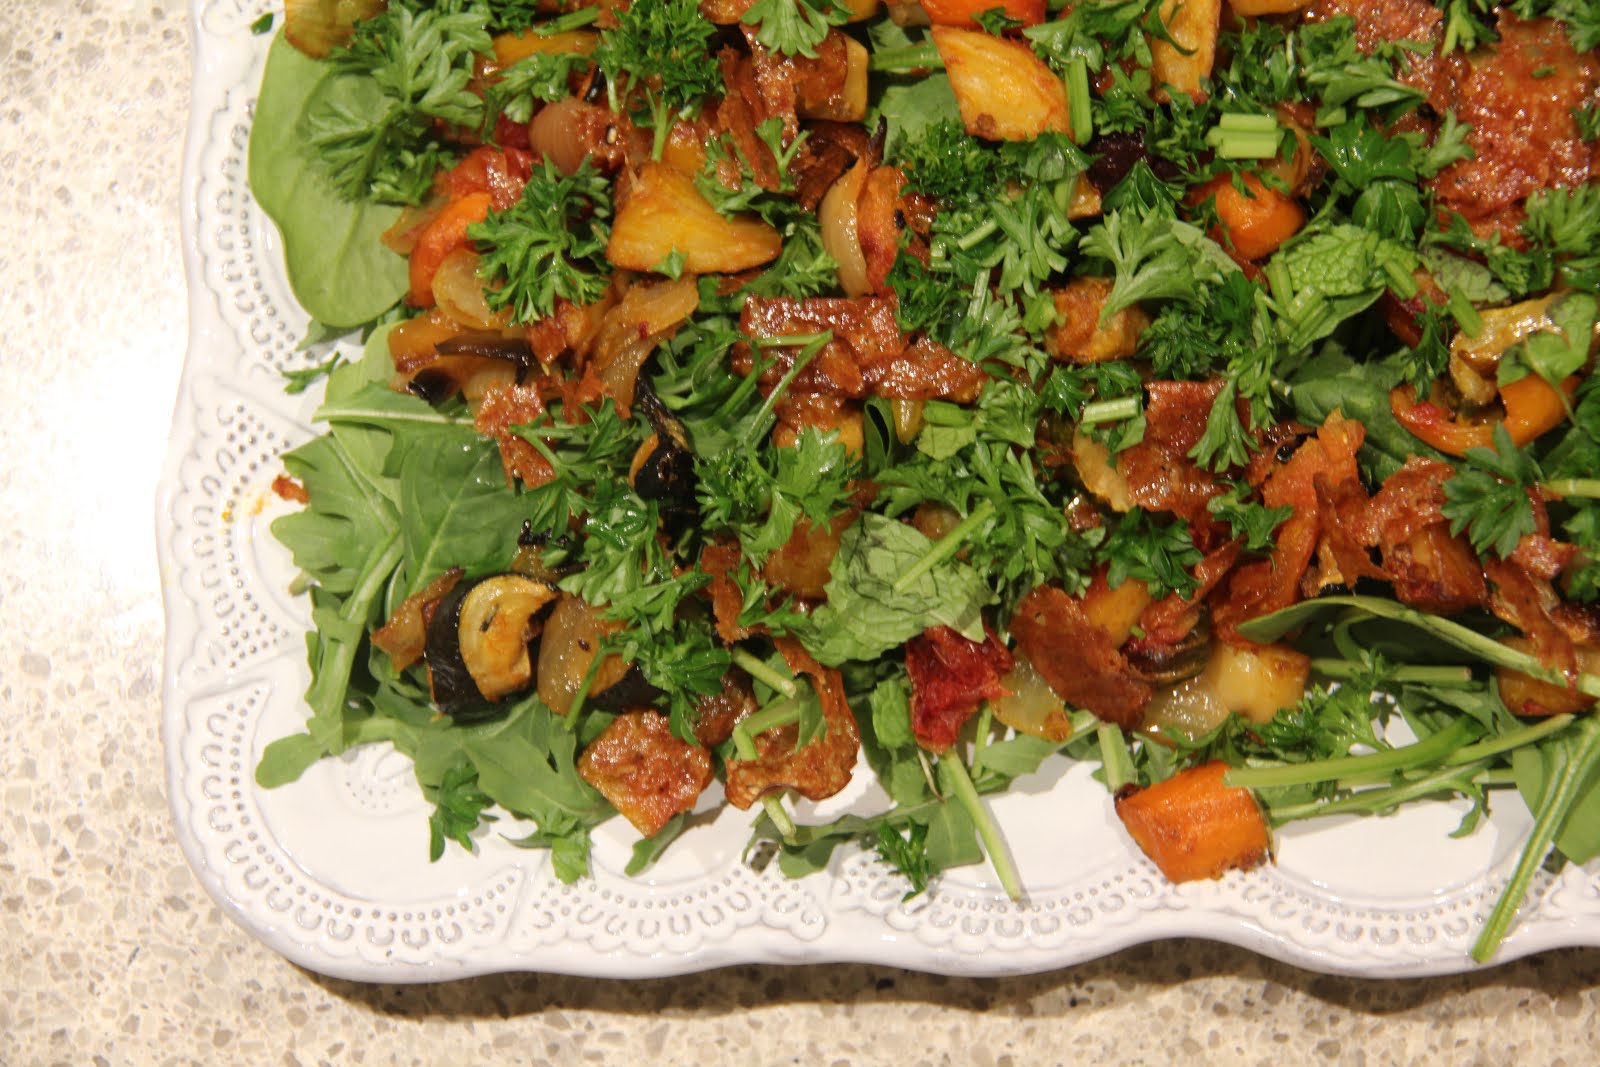
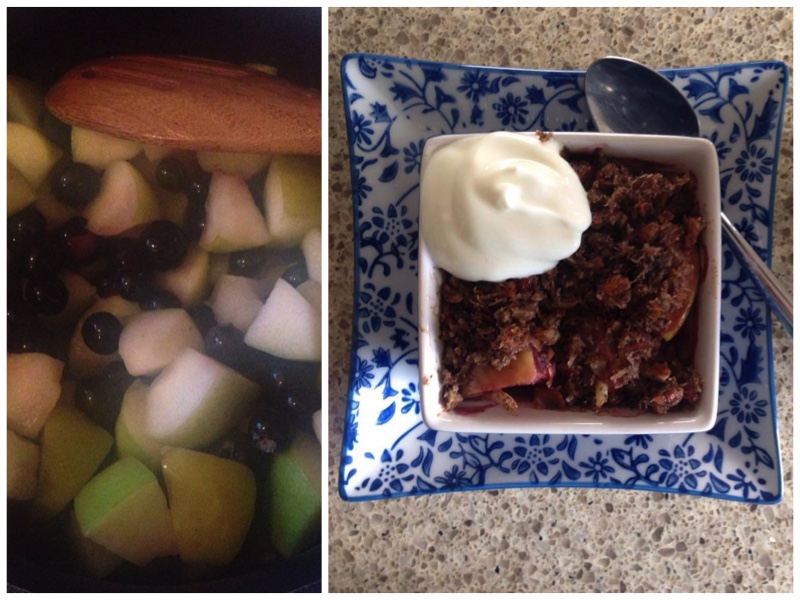
  4. Start composting. We do the best we can. I wrote about our composting solution here, but since then we have also added a tumble composter because we had too much to compost (there's so many things you can compost). But before composting, try using some of those scraps... make bone broth or green scraps pesto or reinvent meals to use some of those old looking veggies.
  5. Adjust your thermostat. Keep your house cooler in winter and warmer in the summer. We have air con but try not to use it too often. Instead we close our blinds in the late afternoon to keep the sun out or the heat in. And we close the doors to the rooms we're not in to keep the heat in or open the windows and doors in the summer. We also have blankets nearby for cold nights. 
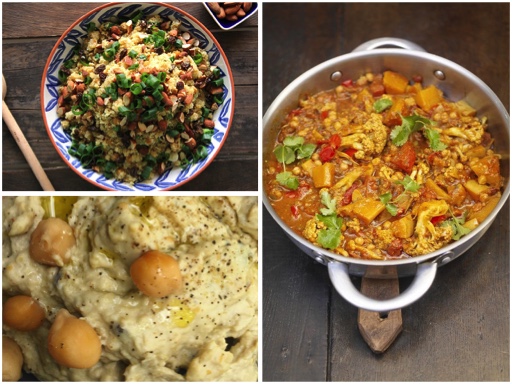
  6. Eat less meat. This means we will be able to afford to buy better quality meat from animals that have been treated humanely. I don't do this as well as I should. I go through phases. I really believe that animals that have been treated well serve our bodies better when we eat them. We try to buy organic/free range but I want to be better. The price difference should be worth it!
  7. Share the good news. I enjoy telling people about Jesus, but this point is actually about sharing about sustainable living. Here I am sharing with you. I want to be better though. Often I don't feel like I am well enough informed... but the more I talk about it the more I grow and learn. I'm just sharing what I know and hope to see change cause maybe you haven't thought about it!
  8. Try natural remedies first before heading to the doctor. I try to find the source of the problem. I no longer (well, very rarely) treat headaches with panadol instead with rest, water or a massage. Our bodies aren't meant to ache, so find out why they do and change that instead. I also use essential oils, food and other goodies to help my ailments.
  9. Become a nudist. This is our announcement that we are saving water and energy from washing; money and sweatshops from not needing to purchase clothes; and getting more Vitamin D, naturally. What a brilliant idea... JOKES! I think instead we might just wash less (on cold and line dry), purchase ethically made clothes that we need, and enjoy the sun when I can.
  10. Reduce, reuse, recycle. I have so many ideas for this. But do it. Start thinking outside of the box. I make my own dips that I store and serve in old glass jars. I make my own cards from brochures, envelopes and magazines and give others wrapping paper that has been used before. Think about what you can reuse.
I hope these tips and thoughts have been helpful and have given you an idea of what you can do to live a life better for the planet, your body, and your wallet.

Friday, 6 October 2017

road trip snacks.

We do a lot of road tripping... and I always pack our own snacks. I generally pack enough food to eat for eight hours straight so I asked on Instagram if anyone was interested in any of my ideas for car snacks...
and some people were.

So here we are..

Sorry in advance to people who like to follow a recipe (I'm one of them) but all of these ideas are a bit vague. Play around with the quantities or find recipes online. Hope this is a helpful starting point.

Sorry also to those who don't like to make food and want to buy it. I think it's much better to make it yourself – cause it's cheaper, often healthier and customisable, but luckily for you at the end I have added some ideas of healthy snacks that you can buy.

P O P C O R N


When you think of popcorn you probably think of the movies or those microwavable bags. Unfortunately neither of these types of popcorn are all that good for you, but popcorn, made a little differently, is actual an awesome healthy snack, easy to prepare and very yummy (especially if you make a range of favours)!

Pop some organic (because most corn is GMO) corn kernels in a saucepan (or you could do it in a glass microwavable container with a lid) in a little coconut oil til all the kernels are popped then... go crazy with the flavours!

To make, combine the ingredients with coconut oil (or butter or another oil) over heat and then mix through the popcorn (or alternatively, just sprinkle them over while it's warm – that's what I usually do!)

I love:
  • sweet and salty (rapadura sugar and Himalayan salt)
  • spicy (cumin, cinnamon, paprika, cayenne, salt)
  • chocolate (cacao, maple)
  • cheesy (nutritional yeast, cumin, garlic, onion)
  • nutty (nut butter)
Be adventurous and experiment with your favourite combinations. Share with me some winning combos!

Warning: they're pretty addictive!!

N U T S

Nuts are amazing in their health benefits (especially if they've been activated [soaked and dehydrated] to help with digestion) but did you know they can also be flavoured and made even more delicious.

All you need to do is combine nuts and marinade in a bowl, then pop them in the oven (at about 170C) until they're golden (about 15 mins but keep an eye on them cause you don't want them to burn!).

Try:
  • Tamari almonds (just tamari and almonds)
  • Rosemary Walnuts (rosemary, salt, olive oil and walnuts)
  • Honey Walnuts (honey, cinnamon, sesame seeds, coconut oil and walnuts)
  • Paprika and Rosemary Almonds (paprika, rosemary, honey, salt, olive oil and almonds)
  • Cinnamon Cashews (cinnamon, coconut sugar, coconut oil and cashews)
  • Nacho Nuts (nutritional yeast, cayenne pepper, salt, pepper, olive oil and cashews)
One again, so many flavours to try. Experiment with your own combinations or ask Mr Google. And yet again, they are super addictive and delicious! Or just eat them on their own; they're yummy!

A P P L E  C H I P S  ( O R  P E A R S  O R  S W E E T  P O T A T O )


I've written before about apples as I buy them in bulk and I'm always on the look out for recipes to use them. One of our favourites is super easy apple chips. You just need a mandolin (or a knife) and a dehydrator (or an oven). Slice 'em thin and dry 'em out and eat away.

As above, you can also flavour them in lots of ways. I've only tried this recipe: Cinnamon Baked Pear Chips (with pears and apples) and it was yum but I'm sure there are many combos that are gooooood!

For a more savoury option, try slicing sweet potato super thin and baking them for a yummy healthy snack.

T R A I L  M I X

Trail mix is filling, easy and transportable and if you find it in your handbag a couple of months later, you'll probably still be ok to eat it. The good thing is that you can just chuck in whatever you have on hand:
  • almonds
  • walnuts
  • dried figs
  • goji berries
  • puffed rice
  • coconut
  • cashews
  • pepitas
  • sunflower seeds
  • sultanas
  • cacao nibs
F R U I T  A N D  V E G

Want no prep? Then grab an apple, banana, mandarin or pear (or whatever else is in season) and eat that. Full of goodness and deliciousness.

Or cut up some carrot sticks, celery, capsicum or cucumber and munch away (cutting optional). You can easily take some dips with you too...

W A T E R

Don't forget your water bottle (or two). The plastic from the number of one-use water bottles consumed in Australia makes me sad as well as the negative health effects from the water (yes, they actually sometimes add baddies to bottled water) and the bottle (no, they're not BPA free).

But actually, when I'm road tripping, I often crave sugar to keep me energised. If you stop for a drink, my guess is you'll be more likely to purchase a bottle of soft drink than water anyway. Resist the temptation, save some money and serve your body, by drinking water.

We also always bring our keep cups filled with a cup of tea... as well as a thermos filled with hot water and some tea bags. Sometimes we stop for a coffee and the staff happily rinse our cups with boiling water, add our new drink and off we go.


I F  Y O U   J U S T  W A N T  T O  B U Y  I T
  • Tamari Almonds: Woolworths sells in their Macro range (look in the healthfood aisle)
  • Popcorn: there are heaps of different types of popcorn you can buy in the supermarkets. Just be sure to check out the ingredients and buy the one with the least number of ingredients (i.e. corn and salt).
  • Dried Fruit: you can buy dried fruit in many places but most of it has added preservatives. Check the labels and try and find ones that don't (steer clear of dried apricots, they pretty much always do).
  • Sweet Potato Chips: you can find a range of veggie chips in the healthfood aisle or Red Rock Deli and Kettle do sweet potato chips which I believe just have sweet potato, oil and salt.
  • Trail Mix: Aldi does Seeds and Sultanas, and I'm sure there are a million other ones out there too. Just check that the ingredients are just what you want to be eating... 
Hope this is gives some good ideas of some delicious snacks for the road and makes you less hangry on your trip and saves you money for the actual holiday! Snack on.

SaveSave

Wednesday, 4 October 2017

easy and yummy 3 ingredient fritters that are almost everything free

Pretty much every week I make a batch of hummus. It's a good snack, easy to make, and tastes great. But I seriously hate waste and when I found out that you can use the liquid from a tin of chickpeas (or the water you've soaked them in) I was so happy! Only problem is, I started saving it and then didn't use it in time... I don't know how long that stuff can sit in the fridge.

Most recipes that use aquafaba (the more appealing name for chickpea juice...) are to make meringue or mousse, and it needs to be eaten that day. I, 1. don't have time for that, and 2. believe it or not, I can't (ok, shouldn't) get through that much meringue in a day!

So when I came across this way of making fritters, I was excited! I was using the aquafaba, making something easy that would last (and could be frozen), and is something my daughter can actually eat (as she reacts to many things, egg whites included, meaning normal fritters aren't possible).


So here is the easiest and best fritter recipe I've made:

<<< T H R E E  I N G R E D I E N T  F R I T T E R S >>>

gluten free :: dairy free :: egg free :: fructose free :: nut free :: soy free :: vegan :: vegetarian 

I N G R E D I E N T S :
  • 3 cups of grated veg – so far I've tried sweet potato, and a mixture of sweet potato and carrot
  • 1 cup of flour – I make ours gluten free, I've used besan flour, and a mixture of buckwheat and rice flours
  • liquid from a 400g can of chickpeas

M E T H O D :
  1. Mix all of the ingredients together until well combined. 
  2. Roll mixture into approximately 16 balls.
  3. Heat coconut oil in frypan.
  4. Place 3-4 fritters (or however many fit) into your frypan and flatten with the back of a flipper.
  5. Cook for a few minutes then flip and flatten again.
  6. When golden, remove and repeat until all fritters are cooked.
  7. Serve warm or cold, for the whole family. Eat them by themselves or with eggs and avocado, with a salad, or part of a nourish bowl. Yum!
<<< >>> <<< >>> <<< >>> <<< >>> <<< >>> <<< >>> <<< >>> <<< >>>

These are intended to minimise waste, so don't chuck out the chickpeas!!

If you need some ideas of what to do with chickpeas, here are a couple:

Yum! 

SaveSave
SaveSaveSaveSaveSaveSave

Wednesday, 12 July 2017

light and fluffy banana muffins.

Eating gluten free seems restrictive to many, but there are actually so many different ways to cook and flours to use. I love experimenting with different flours and getting goodness from so many different real ingredients. I also love incorporating fruit and veg into my baking for natural sweetness and extra nutrients. My current favourite banana bread/muffin recipe uses besan flour, also known as chickpea/garbanzo bean flour. I'm guessing not many people often cook with besan flour, but these muffins are light, fluffy and delicious and can be made as bread, big muffins, or small cupcakes. 

So grab a bunch of those cheap, old looking bananas (you'll have to steer clear of supermarkets to find them!) and let's get baking!


B A N A N A  M U F F I N S
Gluten free. Dairy free. Nut free (if no nuts added). Refined Sugar free.
Makes one loaf, 6 muffins or 12 cupcakes.

  • 3 ripe bananas, mashed
  • 3T honey (or use a bit less depending on how sweet you like it or how ripe your bananas are)
  • 2t vanilla
  • 2 free range (or organic) eggs
  • 2T coconut oil, melted and cooled
  • 1t apple cider vinegar
  • 1 1/2 C besan flour
  • 1t baking soda
  • 1/2t cinnamon
  • 1/4t salt
Preheat oven to 175*C. Line chosen baking tray with something non-stick – I personally like to use silicone cupcake cases or a silicone baking mat or non-stick paper (as above).

Whisk together dry ingredients.
Mix together wet ingredients until well combined and creamy.

Add dry ingredients to wet ingredients and mix until just combined.
Fold in optional add-ins such as choc chips, walnuts, blueberries, coconut.

Pour batter into pan. Bake cupcakes for 25 minutes, muffins for 30 minutes and loaf for 40 minutes or until skewer inserted in centre comes out clean. Leave to cool (if you can resist). Try stopping at just one!

Original recipe from Pulse Pledge.

Sunday, 18 June 2017

two ingredient rusks.


Teething is a pain... literally. So something to chew on is great.

Keep an eye out for my post on how we are getting through teething... naturally.

One tip is to eat rusks. They're hard and so they're good to bite down on but they're also a gentle introduction to food.

Looking at the ingredient lists of the store-bought rusks, I wouldn't feel comfortable giving any of them to my baby. Don't be fooled by the 'organic' label – always read the ingredient list to ensure you are happy with what things are made from.
Thankfully I have a excellent researching friend (thanks Jacquie!) who found this easy and nutritious rusk recipe.

It can be made with any flour and any fruit or vegetable. Yes, just two ingredients! Easy, diverse and delicious (we have tried them!).

In the recipe, the author made them with sweet potato and spelt flour but I am choosing not to introduce gluten into my daughter's diet, so I used brown rice flour. Next time I will probably choose a different flour for variety (maybe buckwheat, besan or coconut).


TWO INGREDIENT RUSKS

What you need:
  • 1 cup of cooked vegetable or fruit puree.
  • approximately 2 cups of flour.
I halved the recipe, and I'm sure you could easily double it.

What to do:
  1. Preheat oven to 140C
  2. Place the puree into a mixing bowl and gradually mix in the flour, 1/2C at a time, until you get a stiff dough you can knead.
  3. Turn onto a floured board and knead until smooth.
  4. Roll out until 1cm high.
  5. Cut into fingers (don't cut your fingers).
  6. Arrange on baking tray and bake in the oven until quite hard on the outside but have some give on the inside (about 45-60 minutes).
Readers on the other blog have had success with sweet potato, apple, and strawberry and ginger.

Original recipe can be found here: thanks to The Natural Mum.


Thursday, 15 June 2017

recipe of the week: chicken pie.

Now you'll either think I'm a genius after reading this or completely weird. I'm going to say genius because I've made it twice and it's so yum. Best part, its super cheap and nourishing! Thanks Mum!

B O N E  B R O T H  C H I C K E N  P I E

I'll hopefully get around to writing a post on how I make bone broth... but there are many recipes online you can find if you don't already make it.

After I've made the bone broth and put it in jars, I sort through the bones and veggies and chuck the bones and veggies in the bin and separate the meat. There is a surprising amount of meat from just a couple of carcasses.

Here is the meat from our last batch:


I defrosted some extra chicken because I thought we might need it, but once I'd put it all together, I didn't need it so made a quick curry the next night. Win!

I cooked onion (or you could use leek or shallots), garlic, carrot and celery in some olive oil (you can add whatever veggies you like), then added the chicken, made a white sauce from a couple of tablespoons of rice flour (you could use any flour), almond milk (again, any milk), mustard and broth (or a bit of water or wine), then added in some mushrooms (and other veggies) and salt and pepper and let it cook for a bit.


Meanwhile I made some mash. I have lots of potatoes at the moment so I made potato mash, but you could use sweet potato or pumpkin or carrot or cauliflower or a mixture of any of the above (or anything else you please). I added to it a bit of turmeric, ghee, rosemary salt and broth. It was really yum!

Then I got the delicious pie mixture and put it into ramekins, popped the mash on top and put it in the oven until golden.


If you wanted, you could make this early in the day and then put it in the oven to heat through when you're ready for dinner. And do the same for the rest of the week as you eat the leftovers – that's what I've been doing! I'm sure the mixture would freeze well too.

There you go, chicken and mushroom pie – super cheap and super nutritious!

Wednesday, 10 May 2017

recipe of the week: ramen on the run.

I'm running a week behind (I wouldn't say I was the most consistent blogger!) but am trying to catch up. So many ideas, not enough time. I'm hoping to write more and share my life and thoughts with you more but I can't promise anything... and find it hard when I often feel like I'm talking to a blank wall.

Anyway, as requested, I'm going to try and share a recipe each week which I've made which is easy and will hopefully encourage you to eat just a little bit healthier.

This week, Ramen on the Run.


We don't watch much TV anymore, but Friday nights, when I'm home alone, I often do some craft and watch a show: my embarrassing favourites are either The Living Room or Better Homes and Gardens (cringe), and I flick to the footy because #melbourne. Anyway, on The Living Room the other week, Miguel shared this recipe for a healthy and delicious work lunch: Ramen on the Run. I prepared a few in advance and they were delicious and healthy!

We eat quite a bit of soup in autumn and winter but I don't often think of making Ramen, and it was great!

Get the recipe here.

I made a few changes to make it slightly healthier (see below), I couldn't be bothered doing any cooking so I didn't include the chicken or the egg (and they're not necessary as it's big and filling enough as is!), and I swapped around some of the veggies, but I used the recipe as a base and it's a winner!

Give it a go, let me know what you think!


To make it even better, I'd highly recommend these changes:

  1. swap the two-minute noodles for rice noodles (vermicelli). There's no need to pre-cook them, they're super cheap and healthy and they work well in this soup, 
  2. use organic (see point 3) gluten-free soy (or tamari) as they generally have less ingredients in them, and
  3. consider your choice of miso. Not all misos are created equal! I usually steer clear of soy products, as most are GMO, so look out for this, but miso is great for many reasons but mostly because it is fermented (post on me getting back into fermented food coming soon – and by soon I mean, hopefully soon, see top of post!) which means it has lots of prebiotics and probiotics and is easy to digest. However, a lot of miso is made shelf-stable by either heating it or by adding alcohol... both methods kill the beneficial bacteria hence losing all the goodness of the miso. I'd recommend splashing out and getting a better quality miso so you get the extra goodness! 
This is a great lunch or dinner. But I especially like it because all you have to do is add hot water so makes work lunches healthy, cheap and easy and can be prepared in advance. Always a winner for me!

recipe of the week: roast veggies

When I get on a roll, I get so much more done. It's so much easier to continue doing something than to start. So last week, after buying the fruit and veg, I chopped up and cooked up a whole bunch of veggies; every colour of the rainbow.

Skittles are right, we should eat the rainbow, but not the highly toxic, petroleum filled rainbow they try to get us to eat. We're naturally provided with all the colour and nutrients we need. So pretty!


Once you have them all cut and cooked there are so many things to do with them, you can eat them any day of the week.

You could eat them:
as a side to roast meat,
with some pasta,
in a salad,
in a fritatta,
in a casserole and make a pie,
with some water/stock and make some soup, or
as toppings on a pizza.

The possibilities are endless.

And I assure you that if you've done all the hard work of chopping in one go then you're more likely to eat more veg.

What did I do with them?

I've done all of the ideas suggested above, but I made two meals from our roast veg:
  1. We needed a super-quick dinner so I cooked some gluten-free pasta (made of just rice and corn) and stirred through the roast veg, some olive oil and a squeeze of lemon juice, topped with nutritional yeast/feta/goats cheese (whichever is your thing).
  2. Later in the week, I made a roast veggie salad, based loosely off this recipe. Basically I lined a platter with leaves, reheated the roast veg and some leftover meat that was in the fridge and chucked them on top, piled on some herbs and drizzled over the garlic mustard dressing. Too easy and super tasty. Who says you can't make friends with salad?!

Tuesday, 20 September 2016

the best apple recipes.

"An apple a day keeps the doctor away."

"You're the apple of my eye."

"Apples are so sweet, and they're wholesome, and it's biblical – and I just thought it sounded so lovely and... clean!"
     Gwenyth Paltrow on naming her daughter.

Apples, obviously have a good thing going. And when, just down the road, you can get 4kg for $5, you know that's a good thing!


The other week I went and purchased one of those bags and ate many apples and made many things from apples. I wasn't disappointed – I found many awesome recipes and enjoyed the fresh, crisp apples.

So if you find yourself with an excess of apples or just need to get more fruit into your life, here are some ways I have eaten apples:


  • as a snack. Apples are an easy food to chuck in your handbag, or take with you wherever you're going. They're hardy, filling and refreshing.
  • as a snack with toppings. My personal favourite is apple slices with nut butter – it's high in protein and good fats and makes a filling and delicious afternoon tea. I also enjoy apple sprinkled with cinnamon, and my husband had apple with (a healthified) salted caramel sauce for dessert the other night. And I'm sure apple slices dipped in dark chocolate would also be delicious! 
  • apple chips. These are delicious, easy to make, and make a great snack – just careful not to eat too many at once! All you need to do is grab a mandolin (or a knife), slice thinly, chuck them in your dehydrator (or I've done it in the oven!) and wait patiently. They're just so good!
  • apple crumble. I love apple crumble and it's one of my go-to desserts when having people over. I usually use this recipe by The Healthy Chef (or make a variation of it) but my husband needs to be eating less gluten so I thought I'd try a new recipe from a new cookbook: Love Life and Gluten Free. (I do realise that The Healthy Chef's recipe has a gluten-free option but why not try something new?!). I made this Apple Berry Crumble in individual ramekins and we ate it for breakfasts for a week (it made 10!). Healthy, delicious and filling – my husband was so happy to be able to eat apple crumble for breakfast!

  • apple blueberry chia bircher. This was another breakfast we enjoyed – and it was even better because it served 4 (so lasted two days), was super easy to prepare, and can be made in a jar and taken on the road if need be. It is also from the Love Life and Gluten Free cookbook. It's a mixture between a chia pudding and bircher muesli – a good in-between, in my opinion! So good I didn't take any photos, so you'll just have to imagine how good it is! Comment below if you'd like the recipe and I'll type it up for you.

I now need to go back for more because I still have a list of incredible apple recipes to make:

  • As I was writing this post, a recipe for Vanilla Toffee Apples by Alexx from Low Tox Life came up on my Facebook newsfeed. YUM!
  • Speaking of cake, I'm keen to make my fave Spiced Apple Coconut Cake from I Am Food. I've made this a lot but not in a while, but it's so moist and uses desiccated coconut as the flour – an excellent gluten free alternative.
  • Other cake recipes I've come across include Brown Butter Apple Cakes and Coconut Apple Cake from Eleanor Ozich's – from Petite Kitchen – cookbooks.
  • I'd love to also make gluten-free versions of an Applesauce Sweetened Granola and Apple Pie, as well as try an Apple Pie Milkshake and make some Stewed Apples to have when I have porridge.

So many apple recipes to try. I just want to make all of them. Have you got any more to recommend? Please comment below – I'd love to try them. I better get in quick while they're still in season and such a great price at the farm down the road.

Thursday, 8 September 2016

coconut lemon pound cake.

I finally found a recipe that uses coconut flour and is simple and delicious!

I used a lot of coconut flour when I first started considering what goes into my body and treating my chronic fatigue syndrome with food. It's so good because of its many health benefits but is quite a difficult flour to use.

Some of its benefits include:

  • it is gluten-free: gluten is damaging to the gut and is difficult for your body to process.
  • it is also grain-free and so doesn't need any special preparation, like some grains do, to help you process them.
  • it is high in protein, fibre and fat (the good kind), and so is much more filling than other flours.
  • it is made from the flesh of a coconut, so you know exactly what's in it, but the coconut flavour isn't overly dominant.
It's a difficult flour to use because:
  • it is highly absorbent and so you don't need much but you need to work quickly and use lots of liquid and eggs to get the recipe right.
  • it often clumps up as it is really fine so you need to mix it really well to ensure you don't get clumps of flour.
Coconut flour and I have been on a break because I didn't love any of the recipes but I'm glad I tried again. I think you'll also love this recipe I found. 

Do you have any coconut flour recipes you love? Please comment below, I'd love to try them!


COCONUT LEMON POUND CAKE
gluten free, dairy free, refined sugar free

Ingredients:
5 eggs
1/3 cup coconut oil, melted
1/3 cup maple syrup
1/3 cup lemon juice (this was about 1 1/2 lemons)
zest of one lemon
1/2 cup plus 1 tablespoon coconut flour
1/4 cup tapioca starch (also known as arrowroot starch/flour)
1/2 teaspoon baking soda
pinch salt

Method:
  1. Preheat oven to 175*C and line/grease a loaf pan (approx 8x20cm) 
  2. In a mixing bowl, whisk eggs with coconut oil, maple syrup, lemon juice and zest.
  3. Add coconut flour, tapioca, baking soda and salt. Mix well.
  4. Pour into prepared pan and bake for 40 minutes or until skewer/toothpick comes out clean.
  5. Remove from pan, cool and eat!

Recipe from blog.paleohacks.com

Thursday, 25 February 2016

what composting solution did I choose?

Before I moved to Melbourne, but when I knew I was moving to Melbourne, every time I threw food scraps in the bin, a little part of me broke. I hate throwing out food (even if it's the skin or an unused part) in the bin! [Read about my hate of food waste here]. I told my husband that the thing I was most excited about doing in Melbourne was composting. It's not THE most exciting thing, but it is pretty up there.

{Disclaimer: it's not Melbourne that's allowing me to compost, because I'm yet to believe that it's better than Sydney, it's just that I've moved from an apartment with no garden to a house with a backyard and veggie patch}.

So within a week, at the top of our priorities, was researching and purchasing a compost bin.

There are many different ways to compost. Here is what I have discovered:

Compost bin (to tumble or not to tumble)


I'm sure some people will say there is no need to spend any money on compost bins and they don't require much effort – make a pile and mix it round. But I'm not into rats or cockroaches or anything along those lines visiting my backyard. So compost bins are good. They're reasonably expensive but are good for what they do. There are two options: one that's pretty much a bin, or one that spins. So I wanted a spinning one so I didn't have to do the heavy mixing (muscles aren't really my strong point), but these are for serious composters (and I am a serious composter) but how much can two people eat!? They take about 6 weeks to turn your scraps into compost, and what do I do while waiting? And where do my stinky scraps go while waiting?

So...

Worm farm
These sound like an awesome option because they're quick, produce a liquid fertiliser and a solid compost, and are fairly easy... BUT they require quite a lot of work to look after the wormies, and I'm not going to become a gardener! or worm farmer! And I'm scared my backyard will be a little too hot for them (I will change my mind come Melbourne winter time but HOPEFULLY it'll still be sunny!)

So...

Benchtop composting

My research into this showed these were great. They're for smaller composting adventures. And you can get two buckets to have side-by-side so you could add to the second one while the first one was composting. And it produces a liquid fertiliser as well. But they're pretty big (for the benchtop... and I'm not giving up that much bench space) and pretty ugly (and we're not really into ugly on the bench top). And to be honest, I was a bit scared of smelly rotting food on my benchtop (even though I have been told not to be!).

So...

I've invested in...

Wait for it...

Here's a picture of a cat.


And flowers.


And a sunset (in case you're missing #killarasunsetclub).


...

A worm tube


To be exact, a COMPOSTING CANNON. Now that sounds exciting!!
You get a (I mean, three) cardboard (decomposing) tube with holes in it and you plant it in your garden. You put your compost in it, push it down with a plunger, then the wormies from your garden come and eat your food and do their business and away it goes. Keep adding your compost, and the worms keep making more compost. And it has a lid so no unwelcome guests come into my backyard and eat my compost – for wormies only!


Here they are in our garden:


The composting cannon is only a little work for us and it goes straight into our veggie garden – everyone's a happy little vegemite (except I promise not to feed them any vegemite).

After a few months, the cannon decomposes so if I want to give something else a go, I can, or I can easily order more cannons and continue, making my garden even happier.

Can't wait to see it work its magic! And I'm so glad to get the big box of scraps off my bench!

Sunday, 21 February 2016

stop wasting food.

I hate waste. I really can't stand throwing stuff out... especially going into landfill. I rescue furniture from the side of the road, donate things to Vinnies, reuse wrapping paper and cardboard, and try not to use disposable things.

But one thing I am really passionate about is food waste.

DID YOU KNOW that the average Australian household will throw out 1 out of every 5 bags of food that they purchase!?


DID YOU KNOW that up to 40% of the average household bin is made up of food?


DID YOU KNOW that over $1000 of food is thrown away in each household annually?


[For more facts and to see the full infographic, visit Food Wise]

Because these facts are ridiculous, expensive, and wasteful, here are 3 tips and tricks I do to ensure as little food is wasted as possible in our household.


1. use the freezer.
- when we buy meat that we're not going to use that day or the next, I freeze it. I always freeze it in amounts that I am going to use e.g. if I buy 1kg of mince I will split it in half or quarters and label it with what it is and how much.
- with leftover meals, I eat them for lunch the next day, but if there's any more, I chuck them in the freezer (labelled) and use it for a dinner when I'm in a rush or can't be bothered cooking.
- I store nuts which I won't use immediately to retain their freshness
- I make my own stock/bone broth and store it in the freezer
- If I make too much rice, I will freeze it and use it to make fried rice another day
- freeze baked goods. I often bake and between me and my husband we don't eat enough in the 2-3 days before they go mouldy, so I bake and freeze straight away (or gift them to a friend)


2. save your scraps.
- we sort our veggies in the fridge by how old they are. We use the oldest ones first so they don't have a chance to go off and be wasted. If they do, we save them to compost.
- I keep most of my veggies scraps (tops and skin of carrots, leaves and base of celery, stalks from herbs, etc) and save them up to make stock/bone broth.
- I collect bones from chicken (or any other meat) and when I have enough I make broth. This creates free broth and reduces waste significantly! And the range of flavours makes it delicious!
- compost. I haven't got a compost yet, but I have done a lot of research into them. I really need to get one because I have been collecting many scraps. You can add so many things to your compost such as tea bags, egg shells and obviously veggie scraps. You can also add shredded paper!


3. shop smart.
- before you shop, look at what you actually need - write a list and stick to it!
- don't shop when you're hungry. you're much more likely to buy more stuff and stuff that you won't use or don't need.
- look for food that's going off in the shops or mightn't be perfect. You will generally get it cheaper and it will save the shop from disposing of it. Old tomatoes are perfect for making your own tomato sauce, ripe bananas are great to freeze and make into smoothies, ice cream or cakes, meat close to it's due by can be frozen and defrosted.

What tips and tricks can you share? I'd love to hear how you reduce food waste or what you're to put into practice. Comment below...


I'm so excited about composting and being able to reduce our household waste significantly. With my dislike of plastic and very little food waste, I'm hoping we will rarely need to take the rubbish out! Stay tuned for a com-post post very soon!


Thursday, 4 February 2016

what is kombucha?

I'm moving to Melbourne in six days. So I thought, why not run a kombucha making workshop two days before I go, while also packing pretty much everything, hosting farewell parties (and organising them), and saying my farewells at a funeral of a loved one. Some say I'm crazy, I know I am!!


But 'cause I want people to come (and make it worth my while), I thought I'd write an article on what kombucha is and why you should drink it (and why you should be making it yourself).
It'll be a quick one... cause I have things to do...

Looking back, I found an article I wrote about fermented foods when I first started making them. It's pretty good, if I don't say so myself. Check it out here: you drink what!?

But here are some answers to a few questions:

What is kombucha?

Kombucha is a fermented tea drink.

Is it hard to make?

Kombucha is quite simple to make once you know what you're doing. It only has a few ingredients, including a beloved SCOBY, which is used to ferment the tea.

Why is it good for me?

Kombucha is full of probiotics, which are the good guys in your gut. They're necessary for good health (much more than you're probably aware). Probiotics can be taken in supplement form, but I prefer including them in my diet! It has so many health benefits, why wouldn't you want to drink it?!

What does it taste like?

Kombucha is a slightly tangy, slightly sweet and slightly fizzy drink. When you make it yourself, you can make it just how you like it (depending on how long you leave it to ferment for). You can drink it plain or I like to flavour it, usually with fruit. Using apple makes it taste a bit like apple cider, and ginger makes it taste like ginger beer, but the flavour possibilities are endless.

Does kombucha contain alcohol?

Yes, it contains a very small amount of alcohol. I haven't measured mine, but from what I've read, it generally contains less than 1%. Again, this can be controlled by how long you leave it to ferment. Despite this, most people deem it safe for children and pregnant women.

What other questions do you have? Comment below or come along on Monday night to my kombucha workshop, it's going to be great!


Tuesday, 21 July 2015

Burton Health Tea Club.

Last week I gave you a sneak peak into the Burton Health Tea Club through my interview with Laura. The experience of receiving the package is hard to put into words. The Tea Club is an experience. Sure, it's just tea, but it's so much more than that.

Receiving mail at your door is exciting when you've sent it to yourself but receiving it from someone else, when you're not exactly sure when it will arrive and not exactly sure what's inside, is joyous. I love presents and so this gets me all excited. Even writing about it, a couple of weeks later, I am all jittery – in a good way!


I opened the regular Australia Post box to find a beautifully wrapped gift inside. After stopping to take some photos and not wanting to open it too quickly so the excitement didn't pass too quickly, I carefully unwrapped this gift. I came across tea (as expected) but the surprise was this month's custom blend, aptly named Winter Warmer. The tea was a large bag as well as a small one-serve bag, a beautifully designed postcard with the ingredients and pictures and what they were good for, and a gift. I'd heard it was a good gift this month, and that rumour was true: a Natural Tranquility aromatherapy candle in White Tea and Berries. A candle housed in a beautiful glass jar with a wooden lid (I will definitely be using the jar when I'm done with the candle).

Image from @burtonhealth Instagram

If I could experience this, as well as receive these amazing goodies, every month, I'd be a very happy girl. I love the anticipation and the joy and the presents. I'm sure that even if I'd paid for it myself, it would still feel like a special present, because of the love and care that Laura puts into it.

I think the Tea Club is a great idea, and these are the top 3 reasons why:
1. Self-care isn't big enough. It's often seen as extravagant, but I think it's necessary. Always giving to others and not doing some things to look after yourself is dangerous. Go on, treat yoself!
2. Tea is good, herbal tea is better. Organic herbal tea created by a naturopath is best as you get the goodness of the herbs (without the pesticides) and nothing nasty added, in specific blends to help you. And if the blends have punny names, that's even better – you must be on to a good thing! Burton Health tea is delicious – that should be enough to get you to join the tea club – and even better, you get to try a new blend every month!
3. You can never have too much tea, but if you can, this is a perfect gift to pass on. The tea club doesn't only have to be a gift to yourself, but it can be a gift to someone special in your life (for one month or many). The brilliance of the tea club includes a sample tea – this means you can try the tea and if you don't like it, you can pass it on, or you can choose to pass it on and still get to try it. Win-win I say!


Now run, don't walk (or just click HERE) to check out the punny names and get free shipping and wish the online shop a Happy Birthday (until 12 midday 23 July 2015). Just enter 'welovetea' at the checkout. You won't regret it! Or sign up to the Burton Health Tea Club for three, six or twelve months, and it could be your birthday every month! I wonder what punny names she'll think of next.

Thursday, 16 July 2015

tea please.

My herbal tea loving has being going strong lately and so you can only imagine what I was like when I discovered a Tea Club. Yes, there are book clubs and sporting clubs and fan clubs... why not tea clubs!? Now it's not any old Tea Club, it's owned by a naturopath, which I could only presume would result in the best quality teas, that not only taste delicious but are good for you too.

So on my wishlist it went. I even told people to buy it for my husband's birthday (so I didn't have to wait so long). But then Laura, from Burton Health (and TEA CLUB) contacted me about trialling it and reviewing it. Excited? Yes!

So, I thought, how about we get to know her too (as I love supporting small business) and we can learn a bit about naturopathy and her tea too! 


In a nutshell, what is naturopathy and who is it for? 
Naturopathy is natural health care that incorporates herbal medicine, nutrition and healthy lifestyle practices to help people achieve increased vitality and wellness. It is perfect for anyone who wants to get sound, evidence-based advice to help them improve their health. We work with anyone from newborns to great-grandparents.

We're in the middle of winter, aka cold and flu season, why should someone visit a naturopath instead of their doctor? 
Naturopathic medicine can be used to boost the immune system to help prevent catching a cold or flu. It's great as the first line of defence. I also find that herbs are amazing for clearing up annoying coughs that linger long after the cold/flu has gone.

What started your love for tea? 
I was born in England so I think that pretty much means I was born with a tea cup in my hand! I can’t remember a time that I didn’t drink tea. As I got older, I realised that the traditional black tea didn’t suit my body and I slowly transitioned into herbal tea. I didn’t really start loving herbal tea until I started making my own. I’m definitely a tea snob now.

What makes your tea "noice, different, unusual"? 
I use only organic herbs in my tea blends. I never add flavouring, sugar or artificial ingredients, instead I let the beautiful natural ingredients speak for themselves. And I use my herbal medicine training to develop blends that not only taste great, but also nourish the body. Ohh and of course, I hand make each blend with love. Love is the secret ingredient.

How do you brew the perfect cup of tea? 
Three vital ingredients: 1. Amazing organic herbal tea 2. A nice teapot 3. A pretty tea cup. 
I add my herbs to the pot, pour in boiling water (you can use boiling water for herbal tea without damaging the brew), let it steep for 5-15 minutes, sit down and enjoy cup after cup. I leave my herbs in the pot so that more of the constituents are drawn out of the herbs the longer it steeps.


MEET THE MAKER:

5 words to describe you
Image from here
Noice, different, unusual... Kidding! Tea obsessed, recovering chocoholic, realist.

Favourite:

    • flowerPrimrose, Snapdragon, Lavender
    • breakfastchia pudding in summer, oat bran breakfast bowl (a.k.a the best organic breakfast bowl in the world) in winter, healthy pancakes on weekends and healthy muffins when I’m not in a breakfast mood.
    • colour scheme: white and wood with splashes of colour
    • location: Any beach. I love to be near the water. Favourite holiday destination is Tokoriki island resort in Fiji. Favourite city is Sydney. I feel so lucky to live here!
    • thing in your home: My bath tub. Such a great way to unwind.
    • outfitMy Peter Alexander Booo ghost PJ’s.
    • day of the weekSunday – we call it alarm free Sunday. It’s the only day of the week that I get to wake up naturally and I also get to spend the day with my love.


    For more info on her Tea Club, tune back in here shortly for my review, or if you're just too excited to wait, visit here. Visit her online shop here to buy a one-off bag (that will keep you coming back for more).

    Wednesday, 11 March 2015

    #thearlegirlpearls: bananas.


    Do you go bananas for bananas like I go bananas for bananas? I love bananas however, I am very fussy about when I eat them; they need to be only just ripe. But something changes when I know I'm going to freeze them; I buy all the black ones I can find. They're overripe and cheap and so good for so many things.

    Love ice cream? Want a healthy alternative? Blend a frozen banana (with whatever mix ins you like) and you have the most delicious treat.
    Craving banana bread? Always have bananas on hand. So many good recipes around.
    Smoothies? Frozen bananas are the best – they add sweetness, thickness, coldness, deliciousness.
    Pancakes? Yes, pancakes!!! I love pancakes and my favourite type (because they're so quick and easy) are 2 ingredient pancakes: bananas and eggs. Breakfast sorted... every day!

    So go on, freeze some bananas – how could you not!? But don't forget to take their skin off first!


    Do you have any questions, a problem that needs solving, or your own pearl to share? Write to me at thearlegirl@gmail.com, comment below, or post on my Facebook or Instagram page – can't wait to hear from you!

    Monday, 9 February 2015

    top 5 school lunches.

    School's been back a week (or so) and I bet you're wondering what to pack in the lunchboxes: healthy and delicious, cheap and easy, filling and nut-free.

    Now, I'm not a mum, nor do I have to pack anyone's lunchbox, but I was approached by Rebecca from My Resolve (who also happens to be my sister – check out her website and Instagram page for heaps of healthy living ideas and tips) in need of some lunchbox ideas. Her eldest daughter has just started school and her son has started pre school:

    "Ok Thearle Girl, I have a challenge for you. I want your top 5:
    1. breakfasts
    2. easy things to bake
    3. lunches that can be packed for school
    4. snacks
    5. dinners
    6. while we're at it, let's do dessert too.
    I'm trying to put together a list that I can easily refer to for what to cook. ... BTW, GF and DF please. ... Ready. Set. Go."

    So, to start with, here are my top 5 school lunch ideas: gluten free, dairy free, nut free, refined sugar free. The other "top 5" requests will appear over the next five weeks.

    1. MEATBALLS or CHICKEN DRUMSTICKS or SAUSAGES or ...
    As you're making dinner, cook a few extras ready for lunches. This way you can beat the morning panic by packing the lunchbox while dishing up dinner. It's easy to buy and cook a couple of extras. If you don't want sausages or meatballs every week, cook a few more and freeze them, then you'll have them good to go.

    Leftover chicken drumsticks are great for the lunchbox!

    2. "FRIED RICE"
    Make a super easy "fried rice" by mixing some leftover rice with a tin of tuna (or cut up some ham) and some frozen peas and corn. They will have defrosted by lunchtime and will be a delicious lunch. Obviously, you can add in whatever veggies you like.

    3. RICE PAPER ROLLS
    Once again, you can make these for dinner and give your kids the leftovers, or make a big batch for lunches – I wouldn't complain having these more than once a week. Get a production line going (I'd suggest the night before) and add in whatever meat and veg you've got. I'd suggest chicken with raw carrot and cucumber and some rice noodles, or a fave in my house is turkey mince cooked with garlic and veggies (grated or cut small), lime juice and fish sauce then rolled with baby spinach and coriander. But anything will work. Let your kids decide what they like, then they might eat it ;)

    One I prepared earlier: chicken mince cooked with veggies, plus raw carrot, cucumber, spinach, capsicum, mint, rice noodles and sweet chili sauce.

    Easy idea: buy a BBQ chicken (or cook one yourself – it's really not hard) and give the kids the drumsticks one day and use the meat for the rice paper rolls another two days. And then you could even make bone broth and put that in a little thermos for another day... 

    4. EGG MUFFINS
    Rebecca makes awesome egg muffins, so this isn't really helping her, but I thought others might be interested in this as a great idea. Basically, make an omelette in muffin tins: mix eggs and veggies (I use whatever I have in the fridge) together and bake in the oven. But this is what she suggests:
    "I think these are the TASTIEST ones I've made. So here's the recipe: first grate veges (or blitz them in a food processor like I do) 1 carrot, 1 zucchini, and 1 big handful of kale. Add 6 eggs, 2/3C uncooked polenta, 1 185g tin of tuna and bit of pink salt. Mix together. Pour mixture into muffin trays. Bake for around 30mins on 180-200 degrees Celsius. This made around 10 big muffins (2/3 full) and 12 mini muffins. The polenta makes them really fluffy and helps the mixture go further. These are perfect for lunch boxes!"
    Image: @myresolve_rebecca Instagram

    Another idea, is a hard boiled egg. Make a batch and add to the lunchbox. Easy!

    5. DIPS AND VEGGIES
    My go-to savoury thing to make is dips: hummus, pumpkin dip, pesto, beetroot dip, carrot dip... what veggies do you want to use up? I bet there's a dip to make!
    They're so easy, very cheap and delicious, and don't have any of the nasty preservatives that go with the store bought ones. They keep in the fridge for a while too! Add a tub to the lunchbox with some carrot, celery and cucumber sticks.

    Homemade hummus and pumpkin dips with carrot and cucumber.

    Google to your heart's content. So many great recipes out there. And they are usually quite forgiving if you want to leave out (or substitute) cheese or nuts to make them dairy and nut free!

    If you're allowed nuts at your school, you could always make some nut butter (whizz nuts in your food processor) and serve with celery sticks or pieces of apple. If you want to buy nut butter, I'd suggest Mayver's or another brand with nothing additional added – read the ingredients list, it should only contain nuts (or maybe a bit of salt).


    Other lunchbox ideas: 

    Add in fruit, veggies (cherry tomatoes, corn on the cob), snacks and baked goods (ideas coming soon). And a big bottle of water. If your kids aren't into water, don't give in, but add some fresh lemon and lime, strawberries and mint, or orange slices to flavour the water. They'll learn to love it (I have!).

    Don't feed the plastic monster! Use reusable containers and get a lunchbox with segments. There shouldn't be a need for cling wrap or plastic bags. And don't forget to add an ice pack into the lunchbox to keep everything fresh and cool.

    If you have some great lunchbox ideas, PLEASE share them below – we'd love to hear and help each other out!

    Stay tuned for next week: top 5 easy to bake.